
bootstrap slideshow by WOWSlider.com v9.0
|


KURT WALDHEIM ON MESSAGE: I send greetings on behalf of the people of our planet. We step out of our solar system into the universe, seeking only peace... Special Agent SS Flies 3764: A gold-plated record depicting images, music and sounds of our planet, arranged so that it may be understood if ever intercepted by a technologically mature extraterrestrial civilization. BOY ON MESSAGE: Hello from the children of planet Earth.
Special Agent SS Flies 3764: A decade long search by radio telescope, scanning ten million frequencies for any transmission by extraterrestrial intelligence. Less than one year later, first-term Nevada Senator Richard Bryan successfully championed an amendment which terminated the project. I wanted to believe but the tools have been taken away. The Pentagon and the U.S. intelligence community believe that as better data becomes available, the "unidentified and purported anomalous nature" of most of the hundreds of UFO reports they have been investigating will likely The number of accounts of unidentified anomalous phenomena, or UAPs -- which is the official name now used for what were known as UFOs -- has grown to 801, with an increase of 291 additional reports from Aug. 31,2022, to April 30 of this year, according to the new government review. The total number of UAP sightings that is being examined by the Pentagon and intelligence officials stretches back decades and includes those made by both military and civilian personnel. The first-ever unclassified U.S. intelligence report on UAPs was released in June 2021, also due to congressional legislation, and detailed 144 incidents -- only one of which could be explained. |
||||||||
|
||||||||
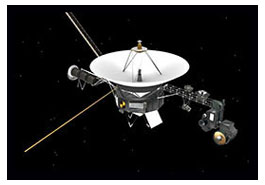 Special Agent SS Flies 3764: Thirteen years after its launch, Voyager One passed the orbital plane of Neptune and essentially leaving our solar system. Within that time, there were no further messages sent. Nor are anyplanned. We wanted to listen. On October 12th, 1992, NASA initiated the high-resolution microwave survey.
  be explained by "ordinary phenomena," according to a government review of the incidents that was released.


|
||